

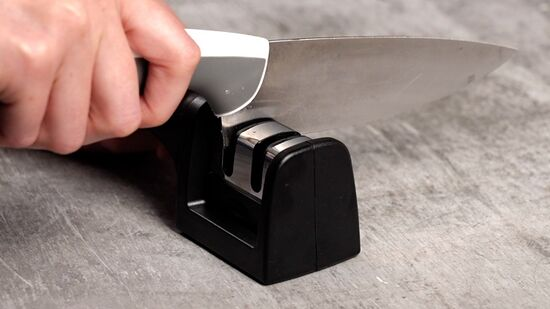
How to Use a Pull-Through Knife Sharpener: Step-by-Step Guide
A dull kitchen knife is harder to control, requires more force, and can make everyday prep work frustrating. A pull-through knife sharpener, also called a manual or handheld sharpener, is one of the simplest ways to refresh the edge on common kitchen knives. Used correctly, it can improve cutting performance in just a few minutes.
This guide explains how to use typical 2-stage, 3-stage, and 4-stage pull-through sharpeners, when each slot is useful, how much pressure to apply, and how to check the result without damaging your knives.
Key Takeaways
- Pull the knife in one direction only; do not push it back through the slot.
- Use the coarse slot only when the knife is very dull or the edge needs rebuilding.
- Keep the blade vertical unless your sharpener instructions say otherwise.
- Use light pressure in the fine or polishing stage to avoid removing too much metal.
- Avoid using a pull-through sharpener on serrated knives or specialty single-bevel knives unless the knife or sharpener maker approves it.
What You Need Before Sharpening
Set up your work area before you begin. Sharpening is simple, but stability matters. You will need:
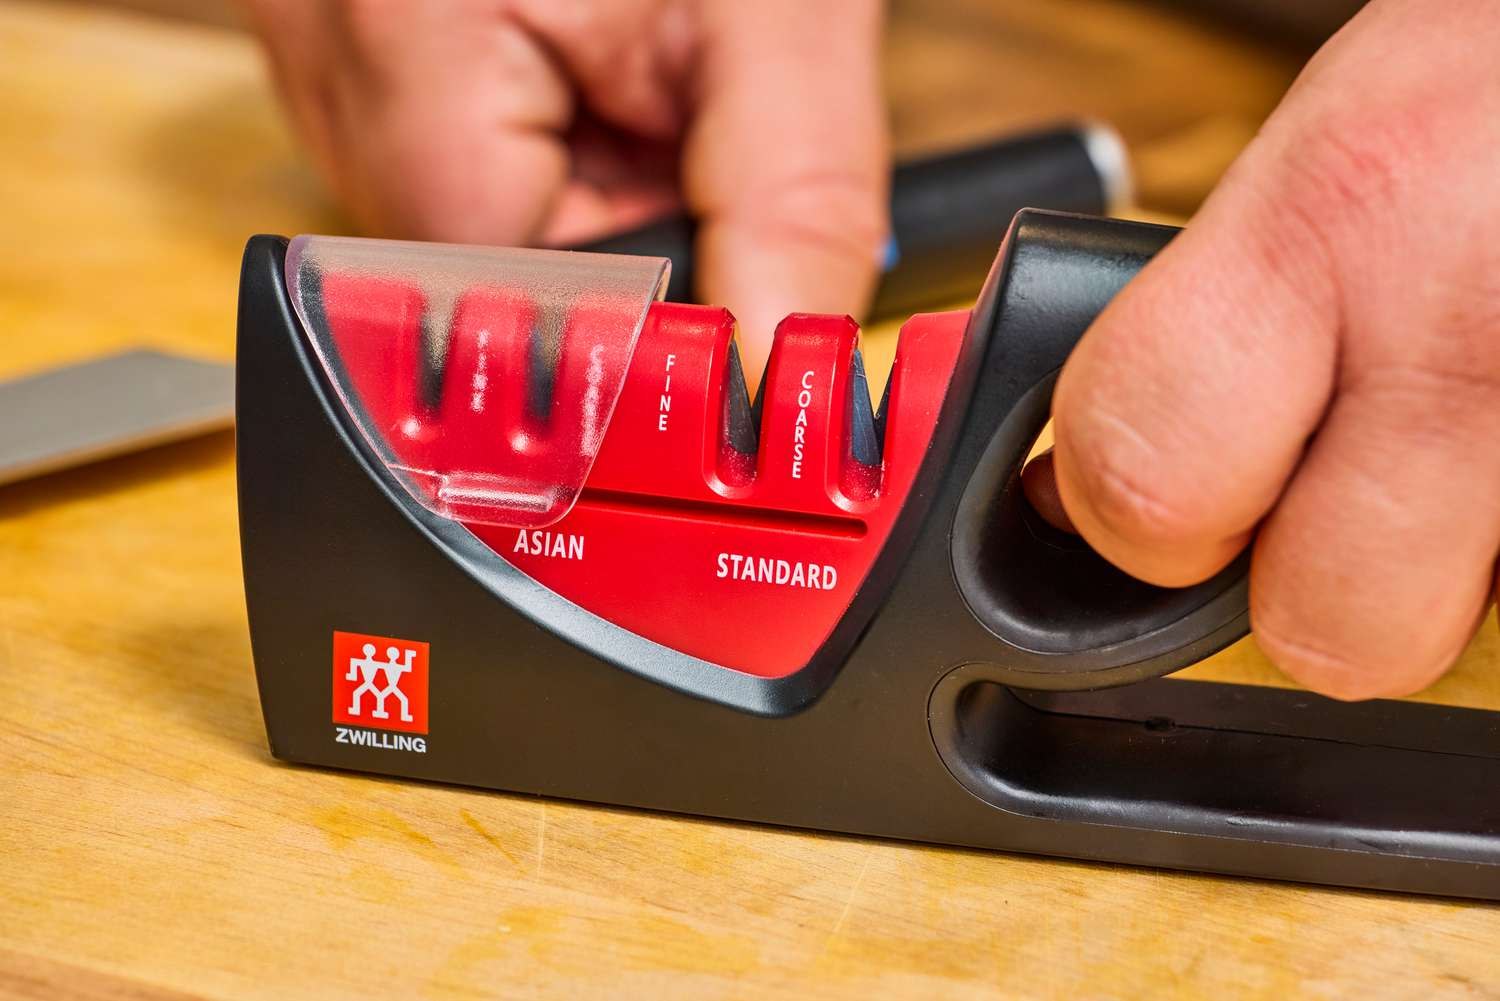
- A pull-through sharpener with suitable slots, such as carbide, ceramic, or diamond-coated sharpening elements.
- A clean, dry kitchen knife, such as a chef’s knife, santoku, paring knife, or utility knife.
- A stable countertop or table.
- A dry towel or non-slip mat if the surface is smooth.
- A cloth or paper towel for wiping the blade after sharpening.
Do not sharpen a wet, oily, or food-covered knife. Moisture and residue can make the handle slippery and may carry debris into the sharpening slots.
Understand the Sharpening Stages
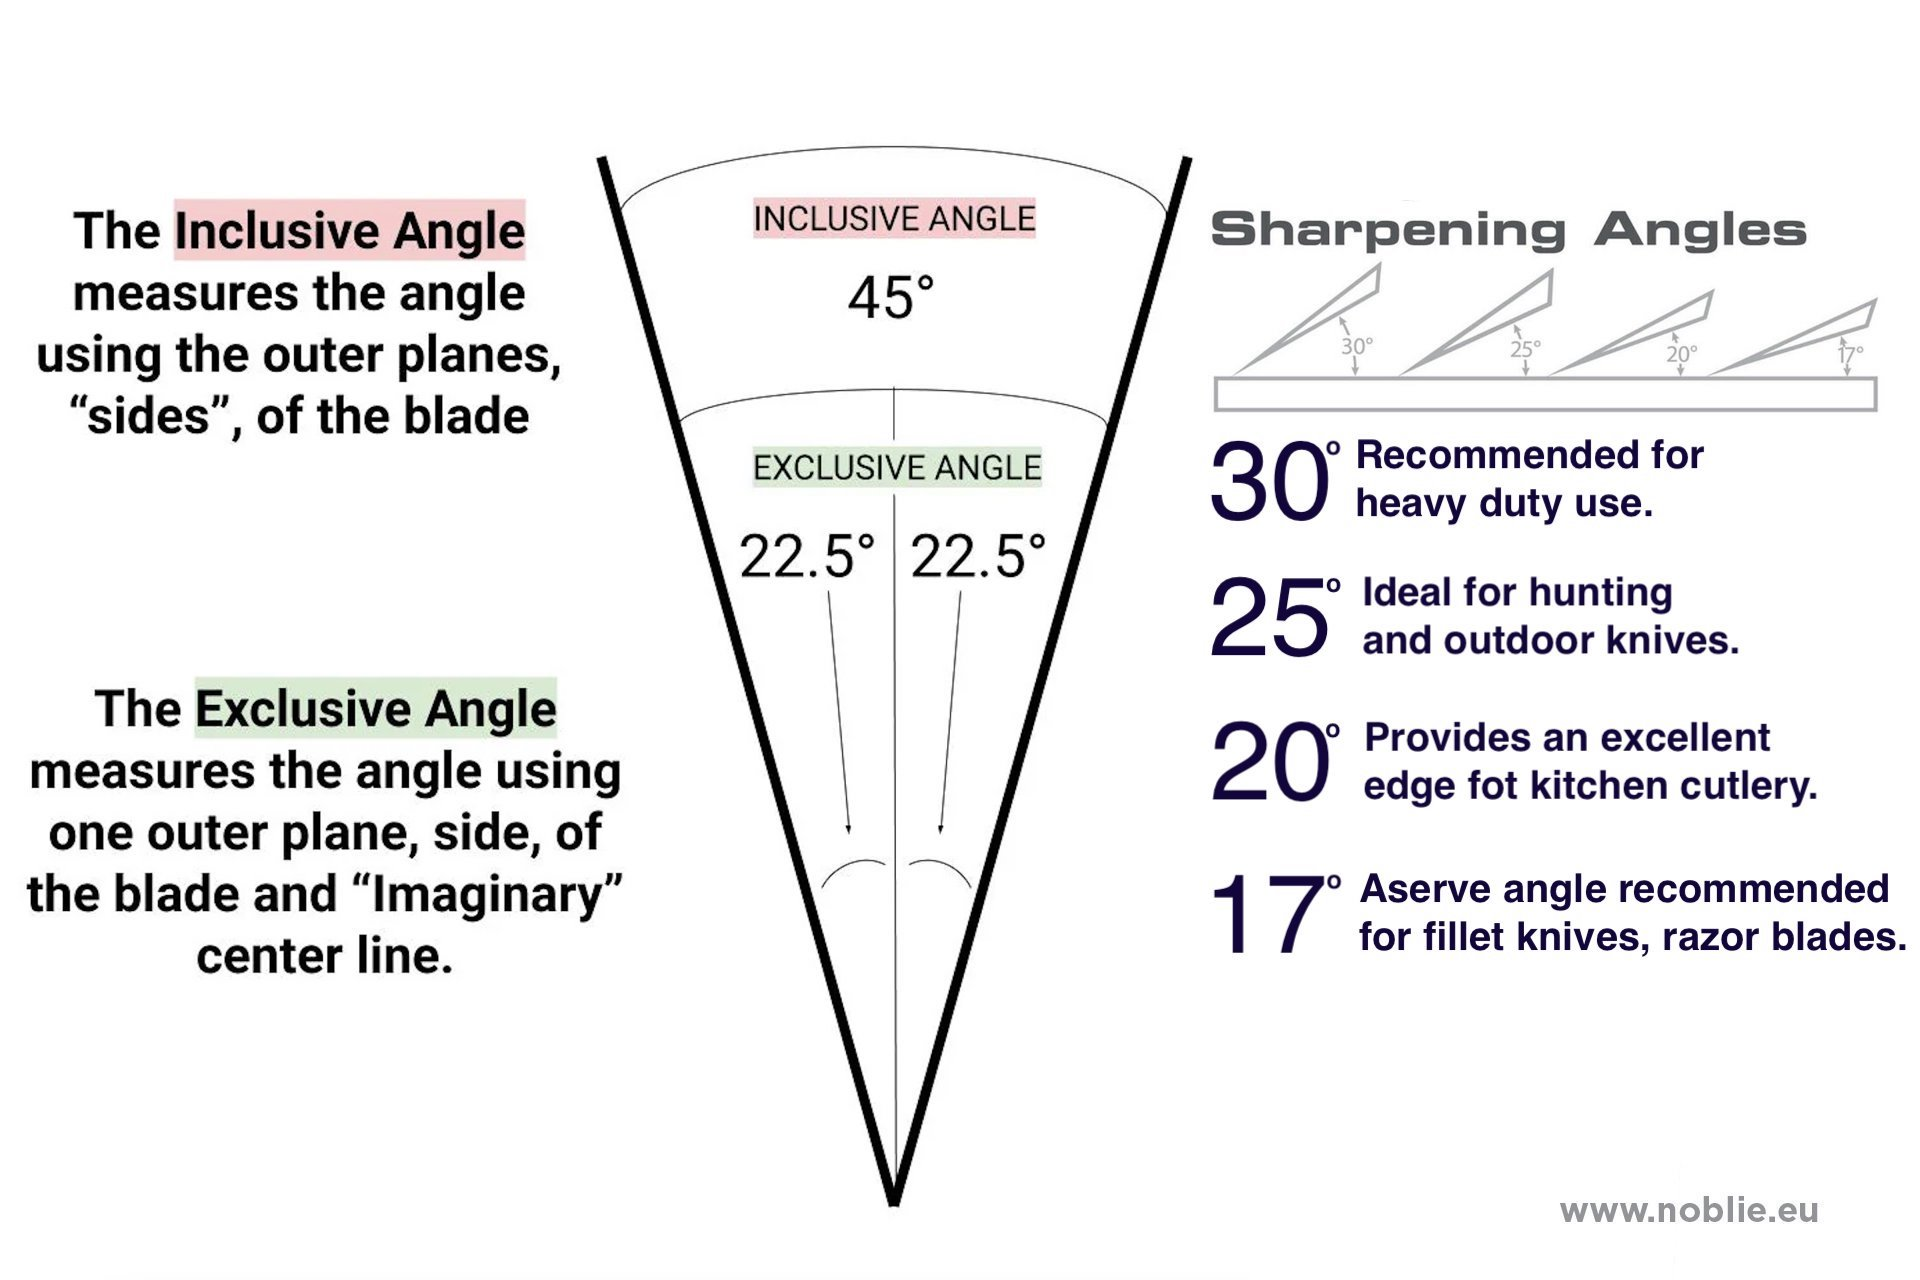
Most pull-through sharpeners guide the blade at a preset angle. Many kitchen sharpeners are designed around a general Western-style edge angle, often around 18 to 20 degrees per side, but the exact angle depends on the product. If your knife requires a special edge angle, check the knife maker’s recommendation before using a fixed-angle sharpener.
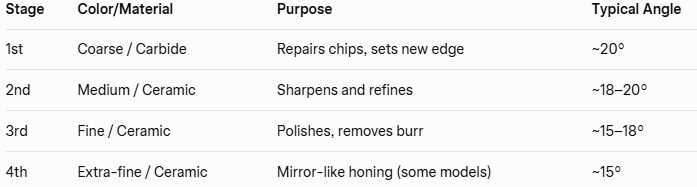
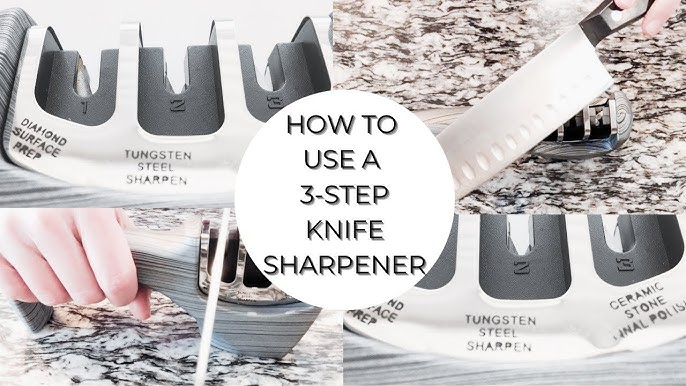
| Stage | Typical Use | Pressure | When to Skip It |
|---|---|---|---|
| Coarse | Restores a very dull edge or minor edge wear | Light to medium | Skip for routine touch-ups |
| Medium | Sharpens and refines the cutting edge | Light to medium | Use fewer passes if the knife is already fairly sharp |
| Fine or Ceramic | Hones and polishes after sharpening | Light | Do not skip for best control and smooth cutting |
| Scissor or Specialty Slot | Only for tools listed by the sharpener instructions | As directed | Skip if the slot is not intended for your knife |
Step-by-Step: How to Sharpen a Kitchen Knife
Step 1: Place the sharpener securely. Put the sharpener on a flat, dry surface. Hold the handle or body firmly with your non-dominant hand. Keep your fingers away from the path of the blade. If the sharpener has a suction base or non-slip bottom, make sure it is seated properly before starting.
Step 2: Start with the right slot. If the knife is extremely dull, begin with the coarse stage. If it still cuts but needs improvement, begin with the medium or sharpening stage. For a weekly maintenance touch-up, the fine stage may be enough.
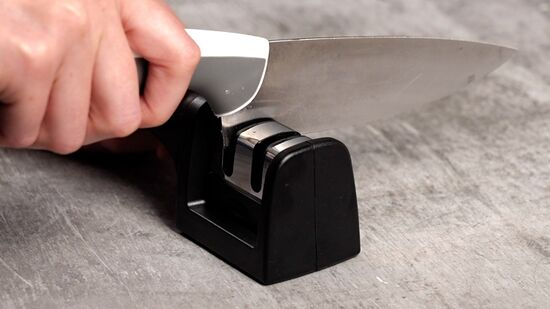
Step 3: Insert the heel of the blade. Place the widest part of the blade, near the handle, into the selected slot. Keep the blade upright and centered. Do not tilt the knife left or right unless your model is specifically designed for an angled motion.
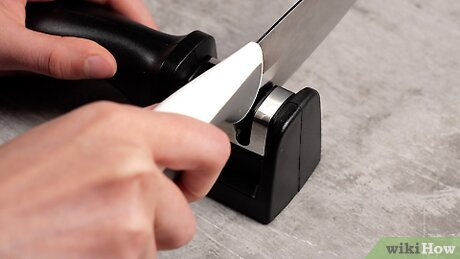
Step 4: Pull from heel to tip. Draw the knife straight back toward you in one smooth motion, moving from the heel of the blade to the tip. Use light to medium downward pressure. Let the sharpening elements do the work; pressing hard can remove unnecessary metal and create an uneven edge.
Step 5: Repeat the passes. For a coarse stage, 3 to 6 controlled pulls are usually enough for a dull kitchen knife. For a medium stage, try 5 to 10 pulls. In the fine or polishing stage, use very light pressure for 6 to 10 pulls. If your sharpener has separate left and right slots, alternate sides as directed by the product instructions.
Step 6: Wipe the blade. After sharpening, carefully wipe the knife with a damp cloth and dry it. This removes fine metal particles from the edge before the knife touches food.
How to Test the Edge Safely
Do not test sharpness by running your finger along the blade. Safer tests give better feedback:
- Paper test: Hold a sheet of copy paper and slice from the top edge downward. A sharp knife should cut cleanly without tearing heavily.
- Tomato test: Try slicing a ripe tomato skin with minimal pressure. If the blade slips, it needs more refinement.
- Food prep test: Cut an onion, pepper, or herb. The blade should feel controlled rather than wedging or crushing.
Common Mistakes to Avoid
Pull-through sharpeners are beginner-friendly, but technique still matters. Avoid these errors:
- Pushing the blade forward: Pull-through sharpeners are generally designed for backward strokes only. Pushing can damage the edge or the sharpening elements.
- Using too much pressure: Heavy pressure does not make the knife sharper faster. It can create a rough, inconsistent edge.
- Overusing the coarse slot: Coarse sharpening removes more metal. Use it only when necessary.
- Sharpening the wrong knife type: Serrated knives, very thin specialty blades, and single-bevel Japanese knives may require different tools or professional service.
- Ignoring cleaning: Metal dust can build up in the slots. Clean the sharpener according to the manufacturer’s instructions.
Care Tips for Better Long-Term Results
Sharpening is only one part of knife care. To keep an edge working longer, use a cutting board that is gentle on blades, such as wood or plastic. Avoid cutting directly on glass, stone, ceramic plates, or metal surfaces. Wash knives by hand, dry them promptly, and store them in a knife block, magnetic strip, sheath, or drawer insert so the edge does not strike other utensils.
How often should you sharpen? For a home kitchen, every few weeks may be enough, depending on use. A knife used daily on tough ingredients may need more frequent touch-ups, while a lightly used knife may go longer. If repeated sharpening does not improve performance, the blade may need professional thinning or edge repair.
FAQ: Pull-Through Knife Sharpeners
Can I use a pull-through sharpener on every kitchen knife?
Not always. It is usually suitable for many straight-edge kitchen knives, but avoid serrated knives, single-bevel knives, and expensive custom blades unless the knife or sharpener instructions confirm compatibility.
How many times should I pull the knife through?
Start with fewer passes than you think you need. Try 3 to 6 pulls in a coarse slot only for dull knives, 5 to 10 in a medium slot, and 6 to 10 light passes in the fine slot. Test the edge before repeating.
Why is my knife still dull after sharpening?
The edge may be rolled, chipped, too thick behind the edge, or mismatched to the sharpener’s angle. Clean the blade, repeat the fine stage lightly, and consider professional sharpening if performance does not improve.
Should I wash the sharpener?
Follow the product instructions. Many manual sharpeners should not be submerged. A small dry brush, cloth, or careful removal of metal dust is often the safer approach.
Is a pull-through sharpener better than a whetstone?
It depends on the user. A pull-through sharpener is faster and easier for routine kitchen maintenance. A whetstone offers more control over angle and finish, but it requires more skill and practice.
Final Advice
A pull-through knife sharpener works best when used with steady hands, light pressure, and the correct stage for the condition of the blade. Treat the coarse slot as a repair step, not a daily habit. Finish with a fine stage, wipe the blade clean, and test the edge safely. With careful use, this simple tool can help keep everyday kitchen knives sharp, predictable, and safer to handle.