

The right custom kitchen utensil manufacturer does more than reproduce a drawing. It helps a buyer identify which product details control functionality, select a feasible production method, document material and assembly requirements, approve meaningful samples, and keep the finished item consistent from pilot production to replenishment.
For kitchenware brands, importers and retail product teams, the difficult decision is often not whether a shape looks attractive. It is whether that shape can be manufactured at the required quality, price, volume and schedule without weakening the customer promise. This guide explains the decisions and evidence behind that transition.
What Does a Custom Kitchen Utensil Manufacturer Actually Do?
A custom kitchen utensil manufacturer produces cooking, food-preparation or serving tools to an agreed product definition. The work may involve a minor change to an established model or an entirely new component design. Unlike buying unmodified inventory, custom manufacturing makes the buyer and supplier jointly responsible for reaching specific product, commercial and approval decisions before the production order is released.
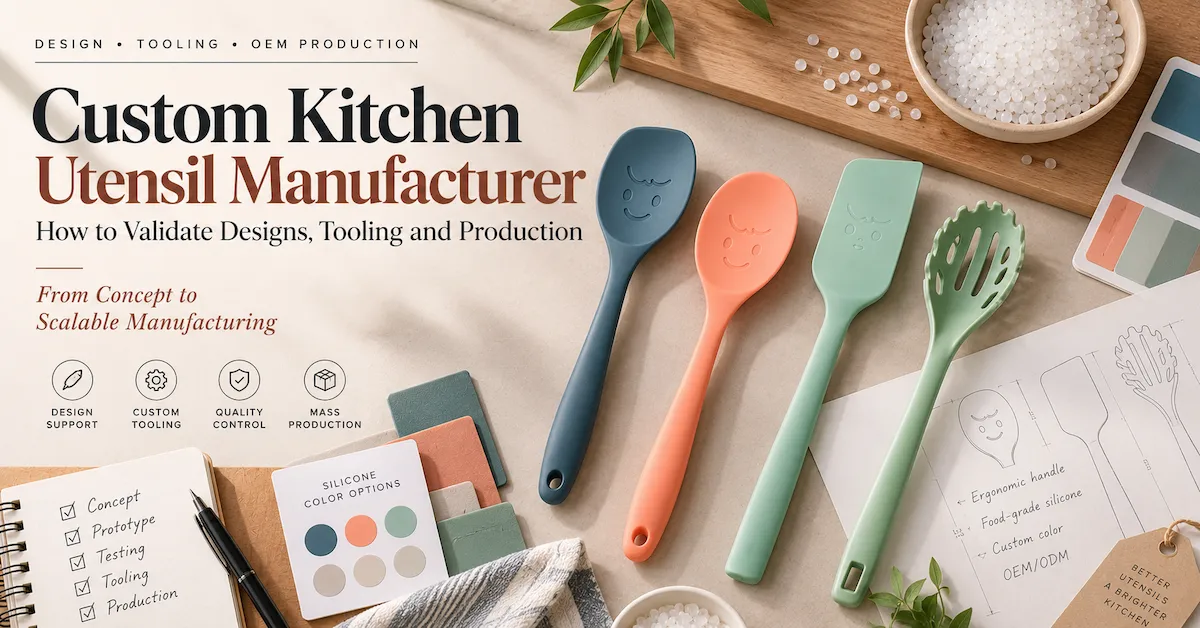
A kitchen utensil can appear simple while containing several interdependent choices: the flexibility of its working end, stiffness of a support core, handle length, angle of entry into a pan, surface finish, joining method, logo location, washing instructions and packaging protection. Moving one feature may change another. A longer spatula may offer extra reach but increase bending; a softer head may scrape a bowl more easily but feel less stable when lifting food. Treat those trade-offs as design problems, not as late-stage complaints.
Three common routes are worth separating. Private labeling typically starts with an available design and adds agreed brand presentation. OEM manufacturing normally follows a buyer-defined drawing or specification, subject to a feasibility review. ODM development adds concept or engineering support, with rights and responsibilities established by agreement. A project can combine these routes across different SKUs; what matters is who defines, approves and owns each deliverable.
BONET HOUSEWARE CO., LTD presents OEM production from drawings or samples and ODM concept, sampling and structural-development support on its official website. The company covers kitchen utensils as well as kitchen knives, scissors, cutting boards and other kitchen products. These public service descriptions are a useful starting point, but a buyer should confirm feasibility for the proposed utensil, rather than assuming every catalog item accepts every modification.
1. Write a Design Brief Around the Cooking Task
The fastest way to receive unsuitable samples is to describe a visual style without describing the task. “Modern silicone spatula with a premium handle” leaves too much unresolved. A better brief says whether the tool is intended to fold batter, scrape a narrow jar, turn food in a shallow pan or serve a hot dish. It identifies the user's likely hand position, the surfaces involved, the cleaning routine and the conditions under which the item will be marketed.
State the destination market and sales channel. A housewares brand selling individual cooking tools may require a hanging display and compact width. A cookware brand may need a utensil designed around a particular pan profile. An e-commerce seller may prioritize parcel protection and accurate set contents, while a professional-kitchen distributor may need a different use-and-cleaning evaluation. Product selection should follow that environment, not the other way around.
Define a hierarchy of needs. The non-negotiables might be safe edges, stable assembly, specified food-contact materials and a usable scraping function. Preferred features might include color, finish or a particular hanging-hole shape. Put target landed cost and planned quantities in the brief, but label them as targets—not proof of manufacturing feasibility. The supplier needs permission to explain where performance, tooling and price cannot all be maximized together.
| Brief element | What the buyer should specify | Why the factory needs it |
|---|---|---|
| Primary job | Scraping, lifting, stirring, serving, measuring or another defined action | Guides head profile and structural stiffness |
| Contact environment | Cookware type, food category, temperatures, exposure and cleaning routine | Guides material and claims review |
| User and grip | Handedness where relevant, hand position, reach, wet-grip and storage needs | Guides handle geometry and ergonomics |
| Appearance | Visual references, colors, finishes, logo and design restrictions | Guides process and approval samples |
| Commercial target | Opening quantity by SKU, target channel, delivery window and target cost basis | Helps compare the viable production routes |
| Approval requirements | Drawings, test conditions, samples, packaging and inspection responsibility | Defines what must be evidenced before release |
A useful deliverable is a one-page product requirement document with a revision number, a shortlist of measurable characteristics and reference images clearly marked as inspiration or controlled specifications. If a requirement has not been decided, write “to be proposed” rather than allowing an unstated factory assumption to become part of the product.
2. Turn a Sketch into Critical-to-Quality Characteristics
Industrial buyers often refer to critical-to-quality characteristics, or CTQs. These are product details whose variation affects use, safety, customer acceptance or another important outcome. A utensil drawing can contain dozens of dimensions, but they are not all equally important. The practical exercise is to ask which characteristics, if changed, would make the utensil fail its intended job.
For a scraper, the working-edge thickness, flexibility and handle connection may dominate. For a ladle, capacity, rim geometry and shaft stiffness may matter more. For tongs, arm alignment, spring feel, closing gap and grip texture deserve attention. Treat the CTQ list as a way to focus measurement and process controls, not as an excuse to omit other applicable product requirements.
Create two documents: a controlled drawing that fixes geometry and an inspection plan that explains how specified characteristics are checked. The plan should identify the measurement method, reference location, units, tolerances and action when a result falls outside the accepted range. No tolerance should be invented simply to make a table look complete. The design team and factory must agree on realistic process capability and product function.
Illustrative example: a long-handled spoon may need an approved bending response under a defined load. “Strong handle” cannot be inspected consistently, but “maximum deflection under the agreed fixture, force and duration” can be. The actual load and limit must come from product development and validation—not from this article or a generic supplier catalog.
3. Choose Material Architecture, Not Just a Marketing Material
The phrase “silicone kitchen utensil” does not necessarily mean that every component is silicone. An assembled tool can contain a working head, embedded reinforcement, handle, sleeve, adhesive or joining component. Similarly, a metal utensil may have a polymer grip, protective coating or attached end piece. To evaluate cost, durability and food-contact obligations, ask for a component-level bill of materials, not only an attractive material label.
Silicone and other elastomer working ends
Silicone can be considered where flexible contact with bowls, cookware or food is needed. Its suitability depends on the specific compound, geometry, mechanical support and intended use. Ask how the manufacturer controls head dimensions, flash, visible surface defects, bubbles, color variation and attachment to any internal support. Review odor and cleaning behavior under agreed product-relevant conditions. Do not assume a universal temperature rating or dishwasher claim from the material family name alone.
Metal components and reinforced constructions
Where a utensil uses stainless steel or another metal, confirm the actual grade, surface finish and component location. Separate exposed food-contact metal from a protected internal reinforcement. Consider corrosion, sharp edges, burrs, seam quality and behavior at attachment points. Metal thickness and geometry may influence springback and bending; a change that reduces weight can also change how the tool performs.
Plastic, wood and composite handles
A molded plastic handle can allow repeatable geometry and color, subject to resin choice and molding control. Wood or bamboo may support a distinctive visual identity but requires specific attention to finish, moisture, joint design and care instructions. Composite assemblies must be evaluated as complete products. An easy-to-clean head does not make an attached wooden handle suitable for the same washing treatment.
For a material substitution, request a new review of the critical characteristics, compliance evidence, product claims, price and sample status. “Equivalent” is a decision supported by data and an approved change record, not merely a procurement description.
Buyer control point: request a drawing showing which components contact food, which are structural, which are decorative and which can be replaced during production. If a material appears in the website's product information, do not infer its position without that drawing.
4. Design for Manufacture Before Paying for Tooling
Design for manufacture (DFM) means checking whether the intended product can be made and inspected repeatably using a realistic process. The review should happen before final tooling, not after expensive adjustments become necessary. The supplier should describe how a component will be formed, released from its mold or fixture, finished, joined and checked.
For a molded head or handle, discuss parting lines, draft where applicable, surface texture, wall thickness transitions and locations that could trap material or create cosmetic defects. For an overmolded or reinforced design, ask how the reinforcement is positioned and held during the process. A flawless rendering gives no answer to whether a core can shift or whether a seam will appear across a sensitive contact edge.
Look at the design from the operator's and inspector's perspective. Can parts be oriented consistently? Are there surfaces that are hard to clean or finish? Can the finished geometry be measured without complicated custom equipment? Is an assembly mistake immediately visible, or could an incorrect component be hidden under the handle? These questions can be more valuable than adding another decorative feature.
Require the DFM review to finish with a short decision log: proposed process, open risks, recommended changes, estimated tooling approach, required trials and characteristics awaiting validation. Suppliers may recommend reasonable modifications. Accept them when they preserve the customer's essential needs and can be demonstrated through a new sample.
5. Engineer the Working End and Handle as One System
Utensil performance emerges from the relationship between the head and the user's hand. A rigid grip paired with a very flexible head may feel disconnected; a short handle with a deep ladle bowl may put the user's hand unnecessarily close to the cooking area. Consider balance, reach and orientation as a system. A visual render should be supplemented by realistic use trials.
Set up a small task-based evaluation with the cookware or mixing vessel typical of the target customer. Test scooping and turning motions, scraping a curved surface, moving the tool across a pan and cleaning the parts where food is likely to collect. Record whether the head rotates, whether the handle slips and whether the tool reaches without awkward contact. Short videos of defined tests can aid cross-border communication, but they should be tied to labeled samples and written criteria.
Handle shape must also be manufacturable. Deep textures, tight corners, narrow necks and decorative grooves may create cleaning or molding problems. Hanging holes and embossed logos can affect tooling, strength or visual acceptance depending on their location. Consider the whole lifecycle: storage, cooking, cleaning, packaging, transport and occasional misuse. Do not claim an ergonomic advantage without an appropriate comparison.
6. Start a Custom Project with Real BONET Product References
A buyer does not need to start from a blank sheet. Published product references can give both teams a shared vocabulary for length, working-end type, appearance and product positioning. BONET's Kitchen Utensil collection includes silicone-based cooking tools that can be reviewed as reference designs. Each remains subject to actual modification feasibility and the selected order terms.
| BONET reference | Published size | Listed materials | Design review opportunity |
|---|---|---|---|
| G2008 Silicone Spatula | 20 × 3 × 1 cm | Carbon steel and silicone | Working edge, compact reach, grip and support-core location |
| G2009 Silicone Spoon | 27 × 6.5 × 1.5 cm | Carbon steel and silicone | Spoon-bowl geometry, handle stiffness and food-contact construction |
| G2007 Cooking Utensil | 27.5 × 6.5 × 1.5 cm | Carbon steel and silicone | Head profile, functional reach, joining details and care requirements |
The metal material field on these published pages states carbon steel, not stainless steel. It does not explain whether or where the metal is concealed. Ask BONET for a component drawing and applicable specifications before describing the internal structure, certification or design changes. Likewise, the product dimensions are catalog information, not agreed production tolerances.
Use the references to ask precise questions: Which shape is closest to the intended task? Is a revised head profile technically feasible? Would the proposed change need new tooling? Could the color or surface be changed without affecting material validation? Are there known limitations with the selected handle or joining design? Such questions are more likely to produce an informative quotation than a request for “your best custom utensil price.”
7. Use Five Approval Gates from Concept to Production
A new kitchen tool should not move directly from a promising concept photo to a bulk purchase order. A staged approval method helps the buyer spend development money only when the previous uncertainty has been resolved. The following five-gate framework is a recommended buyer workflow, not a claim that BONET uses these exact internal names.
| Gate | Evidence required | Decision |
|---|---|---|
| G0 — Requirements | Use case, target market, preliminary material map, budget and volume assumptions | Is the product worth engineering? |
| G1 — Feasibility | DFM comments, proposed process, tooling options, unresolved risks and rough cost scope | Is there a realistic way to make it? |
| G2 — Functional prototype | Identified sample, measured key features, task tests and revision notes | Does the design perform? |
| G3 — Production-intent validation | Approved component materials, final-tooling or process samples, test evidence and packaging proof | Can the intended production route meet requirements? |
| G4 — Release to order | Signed drawing revision, control plan, approved golden sample, commercial terms and inspection method | Is manufacturing authorized? |
Each gate should have one clearly identified approver on the buyer side and a supplier representative responsible for confirming what changed. A photo can document appearance; a physical sample can document feel; a test report can document a defined performance condition. None of them replaces the other. When a sample fails, issue a revision record describing the issue, action and retest, rather than starting another informal message chain.
For major changes, a small production-intent trial may be worthwhile. Ensure that its materials and process truly represent the planned order. A hand-finished prototype can look more refined than production parts, while an early prototype can also be deliberately rough. Sample status must be stated so the buyer does not approve the wrong level of evidence.
8. Clarify Tooling Scope, Ownership and Maintenance
New molds, forming tools, jigs or fixtures can turn a low-cost utensil into an investment project. Ask whether the quoted charge covers engineering, tool manufacture, testing, modifications and ongoing maintenance. Separate one-time charges from recurring production costs and check whether the tooling can support the intended volume and material.
Agree in writing who owns a paid tool, who physically keeps it, whether the buyer may request its transfer, how its identity is recorded and what happens after an inactive period. Ownership of tooling is not automatically the same as ownership of the product design, CAD files or intellectual property. Separate those rights in the project agreement and seek appropriate legal review where material.
Tool changes should follow revision control. Ask the supplier to record the tool version, drawing version and sample version against each production lot. A tool repair that alters a product-contact surface should trigger review of affected features. Color changes or alternative raw materials may also require fresh trials, even when the tool has not changed.
Do not treat the lowest tooling offer as the automatic winner. A realistic quote should explain what is included, what assumptions have been made, the expected first-article process and how rework is handled. If two suppliers quote different tooling concepts, compare the production and ownership implications before comparing price.
9. Validate the Product Against Actual Use Conditions
A useful test plan starts with failure modes rather than a list copied from a generic laboratory catalog. What would cause a customer return or create a safety concern? Possible examples include a head separating from its handle, unacceptable bending, a sharp finishing burr, degraded markings, a damaged edge or inconsistent care performance. Different products require different emphasis.
Define the test method and sample conditioning, not just the name of a test. For a connection-strength test, specify how the utensil is held, where the force is applied, its magnitude, duration and failure definition. For cleaning resistance, state the cleaning routine, number of cycles, substances involved and acceptable change. For heat-use claims, define contact conditions and exposure time. The factory and test provider should agree these details before the trial.
Handle wet-grip performance and user comfort through an agreed method appropriate to the product. If comparative user trials are conducted, avoid extrapolating from an informal demonstration to broad clinical or universal ergonomic claims. A thoughtful factory can help improve manufacturability; the brand still needs to decide which performance claim it can substantiate.
Review transport and packaging as part of product validation. A utensil that meets functional tests can still arrive with rubbed finishes, bent packaging or detached inserts. The retail box and master carton need a separate approval record. Preserve one finished, fully packed reference for later comparison.
10. Plan Food-Contact and Regulatory Evidence by Market
Food-contact documentation should be tied to the intended article and use, not treated as a universal badge. In the United States, the FDA explains that food-contact substance permissions have defined scopes, and food-contact notifications are specific to the notifier and intended use. In the European Union, Regulation (EC) No 1935/2004 establishes a framework for food-contact materials, while Regulation (EC) No 2023/2006 addresses good manufacturing practice. Additional material-specific requirements can apply. These are regulatory reference points, not a statement that any listed BONET model has passed a specific test.
Prepare a component and claims matrix for the destination country. Identify the substance or material, manufacturer or source where necessary, whether it contacts food, the expected food types and use conditions, the applicable authorization or test basis, and the document supporting the retail claim. Ask a qualified laboratory or compliance adviser to determine which assessments are necessary for the finished product and each relevant component.
Beware broad statements such as “FDA certified,” “EU approved,” “BPA free” or “heat safe to any temperature” when no applicable evidence has been reviewed. A report for one material formulation may not cover a different colorant or revised component. Similarly, a factory-management certification is not a product-specific food-contact test. Require the sample and report identifiers to align with the materials being purchased.
Cleaning and safety instructions deserve approval alongside the product. If a handle or joining component has different care requirements from the working head, retail claims must reflect the whole assembly. Involve the local importer or compliance team in labeling, traceability and market-specific requirements before packaging is printed.

11. Ask How the Manufacturer Will Control the Real Production Route
A process chart is helpful only when connected to the actual product. BONET's published manufacturing overview discusses stamping, straightening, heat treatment, grinding, polishing, injection molding, cleaning, assembly, quality inspection and packing. Several operations are specifically described for knives and scissors. A molded silicone spoon will not automatically pass through the same sequence as a cutting blade.
For the utensil in your RFQ, ask the supplier to identify which parts are formed or molded, where components are obtained, which joining and finishing processes apply, and what is inspected at every handoff. Clarify what is performed at the quoted production site and what, if anything, is sourced or subcontracted. Outsourced work is not automatically a problem; undocumented work can be.
Check whether the material callouts in the drawing match the purchasing documents and incoming inspection records. Ask how work-in-progress parts are identified and separated by revision. If an alternative handle core is proposed, determine who approves it and which tests must be repeated. A simple traveler or production record can be more persuasive than a long list of equipment because it connects an operation to a responsible person and an inspection point.
Include a process review in the supplier meeting. Choose one proposed utensil and ask the team to walk from material receipt to carton sealing. Look for a clear answer to “What could go wrong here, how would you notice, and what happens to the affected goods?” The quality of those answers is a practical way to judge production readiness.
12. Build Quality Control into the Manufacturing Plan
Quality control is strongest when critical features are managed before final inspection. An end-of-line check may detect the wrong color, but it may be too late to prevent embedded-core movement or an assembly method that repeatedly damages a part. Divide controls across material receipt, process setup, in-process checks and final packed-goods inspection.
| Stage | Potential concern | Suggested evidence |
|---|---|---|
| Incoming material | Wrong polymer, metal grade, pigment, insert or packaging stock | Approved BOM, supplier documentation, identification and receiving checks |
| Process setup | Incorrect tool revision or settings, displaced insert, wrong color | Setup sign-off and first-article results against approved references |
| In-process | Flash, geometry drift, weak joint, finish damage, missing component | Defined measurements and functional checks at appropriate intervals |
| Final product | Function, appearance or dimensions outside agreed limits | Inspection record linked to lot and approved golden sample |
| Packed goods | Incorrect piece count, barcode, instructions, carton or shipping marks | Packing audit and approved finished-pack reference |
Agree on defect categories and disposition rules before the purchase order. Safety-critical defects need appropriate prevention and handling; they should not be treated as acceptable because an overall sample passes. For attribute-based lot inspection, ISO 2859-1:2026 provides an AQL-indexed sampling framework. The buyer and supplier must agree on the correct inspection level, sample size, acceptance criteria and switching rules when that framework is used. AQL is a sampling parameter, not a guarantee that every uninspected item is defect-free.
Inspection records should identify the model, revision, lot, measured characteristic, result, inspector and decision. If products fail a check, ask for a containment and corrective-action procedure, including what is reworked, scrapped, retested or submitted for customer approval. A quotation that merely says “100% quality guaranteed” is less useful than a transparent plan for preventing and handling variation.
13. Package the Product That Was Actually Approved
Custom packaging is a design interface, not simply a marketing task. A long tool may need restraint inside a box; a glossy finish may rub against other components; an assembled set may shift under transport. Identify the sales channel before choosing the pack format. For supermarket shelves, hanging and shelf dimensions matter. For e-commerce, parcel protection and the accuracy of product photography may be more important.
Confirm the exact component list for sets. A “nine-piece” range might count the holder, tools or accessories differently unless the contract defines each included item. Approve an exploded contents image or packing list along with the final boxed sample. Review outer-carton quantity, gross weight, dimensions, shipping marks and handling needs after the packaging has been finalized.
BONET's customization information lists color boxes, gift boxes, retail packaging, barcode labels and export-carton solutions. The buyer should still request project-specific costs, proofs and packaging minimums. A packaging design change can affect carton volume, freight or fulfillment cost even when the utensil itself remains unchanged.
Keep a single controlled artwork reference, with approved regulatory copy and instructions for the actual destination market. The artwork revision belongs on the product release sheet. Where barcodes and language versions differ, ask how the factory prevents artwork from one SKU or country being packed with another.
14. Calculate Total Development Cost, Not Just Unit Price
The price of a custom utensil depends on the product construction, material, process, tooling, decoration, packaging, order quantity, testing scope and commercial terms. A low unit quotation may omit development charges or assume a simpler construction. Ask each supplier to quote against the same specification revision and to separate nonrecurring charges from recurring costs.
For a transparent illustrative calculation only, suppose a hypothetical new handle tool costs $2,400. If the first confirmed order is 1,000 units, its initial allocation is $2.40 per unit. At 4,000 units, the allocation is $0.60 per unit. That arithmetic does not mean the supplier's actual tool or volume price will follow the example; it simply shows why tooling amortization and first-order quantity need separate discussion.
Also compare design changes by their total commercial effect. Saving a small amount on the raw component may require an expensive new tool or reduce acceptable performance. A nicer finish may add setup and slower production. On the other hand, a manufacturable profile that avoids unnecessary finishing may reduce cost without weakening the function. Ask for alternative quotations that preserve the same essential CTQs.
| Cost component | Request in quotation | Common comparison risk |
|---|---|---|
| Recurring unit price | Price by SKU, specification revision and quantity tier | Different material or finish hidden behind similar product names |
| Tooling and development | Tool ownership, included revisions, trials and payment milestones | Incomplete one-time charges |
| Branding and packaging | Logo process, packaging format, print setup and per-unit cost | Artwork or carton costs excluded |
| Samples and validation | Prototype charges and responsibility for applicable testing | Testing added after price approval |
| Delivery basis | Named Incoterms rule and place, packing information and schedule | Comparing prices on different delivery terms |
Model the landed cost with a forwarder or customs specialist using the current destination requirements. Duty classifications and tariffs depend on the actual product and market; avoid generic promises. For a set, evaluate the cost per saleable complete set, including expected damages or short packs when supported by real data, rather than dividing by an unverified nominal quantity.
15. Understand MOQ and Lead-Time Drivers in Custom Manufacturing
There is no universal MOQ for custom kitchen utensils. The minimum may depend on material procurement, molding or forming setup, pigments, branding, packaging print quantities and batch scheduling. A supplier might be flexible on one existing shape but need a larger commitment for a unique resin color or newly tooled component. Ask for the MOQ by product and by variation, not simply an order-wide minimum.
Lead time should be presented by milestone. Separate drawing approval, tool design, tool fabrication, first-article samples, validation, packaging proof, production, inspection and shipment preparation. Identify which milestone starts only after the previous one is signed. A promised “30-day lead time” is incomplete unless it states whether tooling and artwork approvals are already finished and what date the milestone ends.
Consider a launch structure with a core product and optional variants. Instead of commissioning five colors before the first design is proven, validate the geometry in one agreed material/color configuration, then confirm whether later color variants require additional tests or minimums. The right sequence depends on the technical risks; the key is to prevent aesthetic choices from multiplying unapproved production combinations.
16. Compare Manufacturers Using Evidence, Not a Showroom Impression
When evaluating an OEM kitchen utensil manufacturer, ask for a specific response to the same brief. A strong manufacturer should explain its assumptions and limitations rather than agree to every request immediately. Compare the quality of the engineering discussion, sample documentation, traceability, process explanation and commercial transparency.
A practical supplier review can score design understanding, material control, tool-management clarity, validation evidence, production inspection, packaging capability and communication. Weight these according to the buyer's risk. For example, if the new utensil has a complex embedded joint, its material and joining controls should carry more weight than the speed with which an attractive catalog PDF arrives.
Ask whether the company is manufacturing the proposed parts itself, buying components from qualified partners or coordinating multiple facilities. No arrangement automatically guarantees or undermines quality. What matters is responsibility, component identification and incoming acceptance.Verify any factory certifications, audit status and product-specific reports before making claims in your retail copy.
Use BONET as a concrete comparison option by reviewing its company profile, published process information, the selected utensil references and its OEM/ODM service scope. Then ask the team to show what would apply to your design. This is a defensible way to move from broad marketing material to a project-specific proposal.
17. Prevent Common Custom Utensil Development Failures
Failure 1: approving a photograph as a production sample. Photos can demonstrate appearance, but they cannot establish grip feel, component material or joint strength. Require a clearly identified sample and records for the applicable tests. If a sample is cosmetic only, label it as such.
Failure 2: changing materials without reopening validation. An alternative compound or metal grade may alter performance and regulatory scope. Require an engineering change request, impact assessment and approval before substitution. Treat the phrase “same quality” as a claim to be demonstrated, not a sufficient answer.
Failure 3: leaving the supplier to choose critical tolerances. If critical requirements are not written down, two acceptable-looking batches can behave differently. Agree which characteristics matter, how to inspect them and what to do when they vary.
Failure 4: confusing brand customization with design ownership. Logo application does not establish exclusive rights to a shape. Document tooling, CAD, marks, technical files and use rights separately.
Failure 5: releasing a mixed set before all parts are ready. A perfect ladle does not validate the tongs, holder or spatula. Approve each component and the final packed set. Note which tests cover only one part and which apply to the complete assembly.
Failure 6: treating a reorder as a fresh order. If there is no controlled revision or reference sample, a later shipment may drift in color, dimensions, markings or packaging. Use a locked release dossier and a documented change review instead of relying on memory.
18. Protect Your Reorders with a Product Release Dossier
A custom product becomes a supply program when the manufacturer can repeat it. Establish one compact release package for each SKU: product drawing and revision, component material list, color and branding references, applicable test records, approved production samples, packaging artwork, inspection plan, approved suppliers or substitutions where relevant, and the commercial terms that govern the order.
Give the dossier an owner. A brand manager may control appearance and artwork, an engineer or technical buyer may own functional requirements, and a compliance contact may approve claims. The supplier should identify its own responsible functions. When anyone requests a change, the record should name the previous and proposed state, why it is needed, what products and orders it affects, who must review it and when it becomes effective.
This is especially important when brands launch multiple product variants. A new color may be a simple aesthetic change in one case and a material-validation question in another. A new package may appear harmless but change transport protection. A small geometry adjustment may affect the mold and how a tool works in a pan. The release dossier allows each change to be assessed rather than assumed.
19. A High-Quality RFQ for a Custom Kitchen Utensil Manufacturer
A productive RFQ makes uncertainty visible. You can contact BONET before every technical detail is finalized, but tell the team what has been decided, what remains open and which alternatives are acceptable. This helps the supplier propose a realistic development path rather than quote a generic catalog item that does not meet the intended application.
Copy-ready engineering and sourcing brief
Project: Custom kitchen utensil development for [brand / market / channel]. Please evaluate an OEM or ODM manufacturing route and provide a project-specific proposal.
Product: [spatula / spoon / ladle / turner / tongs / other] with [reference model or attached drawing], intended for [specific cooking task and cookware].
Technical priorities: Working-end geometry, approximate overall dimensions, hand grip, component materials, cleaning routine, target use conditions and essential CTQs.
Customization: Requested structure, colors, finish, logo method, approved artwork, retail set composition and packaging style.
Market evidence: Destination countries, proposed food-contact and performance claims, existing test documents and required supplier or laboratory review.
Volumes: Pilot quantity, planned first commercial order and forecast replenishment by SKU and color. Please state actual MOQ and any variation-specific minimums.
Development proposal requested: DFM risks, proposed process, sample stages, tooling scope and ownership, validation plan, production-inspection plan and approval milestones.
Commercial quote requested: Separate one-time and recurring charges, sample fees, packaging costs, proposed Incoterms rule and place, production lead-time assumptions, and quotation validity.
Attach sketches and reference photos only after labeling what each should communicate. If a competitor's photo is purely a style reference, state that it is not permission to reproduce protected design elements. If you own a complete design, identify the authorized files and restrictions. Request a feasibility response before treating a preliminary quote as final.
Have a utensil concept, drawing or sample?
BONET publishes OEM production by drawing or sample and ODM development support for kitchenware. Send a clear product brief to discuss which parts of your proposal can be evaluated, sampled, modified or quoted.
Frequently Asked Questions About Custom Kitchen Utensil Manufacturing
How do I choose a custom kitchen utensil manufacturer?
Choose a partner that can explain the proposed production method, resolve design-for-manufacture risks, document component materials, provide labeled samples and agree on an inspection plan. Compare project-specific evidence—not only catalog size or an advertised unit price. Ask who controls tooling and changes before placing an OEM order.
What is the difference between OEM and ODM kitchen utensils?
OEM generally follows a specification or drawing provided by the buyer, while ODM involves additional supplier-led design or development. The allocation of intellectual property, tooling and approvals still depends on the contract. An existing design with a custom logo is not necessarily a newly developed OEM product.
Can a manufacturer develop a utensil from a sketch?
It may be possible when the supplier has relevant development resources, but the sketch is only the starting point. Provide use conditions, dimensions, materials, performance needs and commercial targets. Expect a feasibility review, samples, possible engineering revisions and agreed validation before a full production commitment.
Does every custom utensil require a new mold?
No. Some branding or finish changes may use existing production tools, while a new working-end profile or handle geometry may require new or modified tooling. Ask the supplier to classify the change and quote any associated tooling, trials and minimum quantities separately.
What materials are used for custom kitchen utensils?
Common design options include silicone, polymers, metals, wood, bamboo and combinations of these materials. The correct choice depends on the actual function, cleaning requirements and intended food-contact use. Specify each component and ask for supporting documentation; a product label alone does not prove its full construction.
Can I customize silicone spatulas or cooking spoons?
Material, shape, color, finish or decoration changes may be possible, depending on the selected product and manufacturing route. BONET publishes silicone-based utensil references, including G2008 and G2009. Ask whether the proposed modification requires new tooling, material validation or a revised production sample.
How should I approve a custom utensil sample?
Approve it against a controlled drawing and measurable acceptance criteria. Review the construction, function, relevant test evidence, appearance, marking and packaging as separate items. Identify whether the sample is a cosmetic prototype, functional prototype or production-intent article, and retain the final approved reference.
What is a typical MOQ for custom kitchen utensils?
There is no reliable single MOQ across all projects. It may depend on tooling, resin or metal procurement, color, branding process, packaging and production scheduling. Request quantities by model and variation, and compare the costs of existing-tool and new-tool options before deciding.
How long does custom utensil development take?
The schedule depends on the starting design, engineering changes, tooling requirements, sample iterations, tests, packaging and material availability. Request a milestone plan showing what starts after approval and when finished goods can be inspected. Do not confuse tool-development time with routine production lead time.
What documents help establish food-contact suitability?
Ask for component material identification, the relevant regulatory basis for the destination market, applicable test reports or supplier declarations, use restrictions and evidence linked to the sampled article. Have a qualified compliance specialist verify the scope. General “food grade” claims or management certificates are not sufficient by themselves.
How can a buyer keep custom utensils consistent on repeat orders?
Maintain a release dossier for each SKU containing the latest drawing, BOM, approved sample, artwork, packaging and inspection criteria. Require written assessment and authorization for changes to materials, tooling, processes and suppliers. Check the new lot against the same identified references.
How can I request a quotation from BONET?
Send your product concept, reference links or drawing, target markets, intended use, materials, branding, packaging and proposed quantities through BONET's contact page. Request a written feasibility response, sample route, tooling assumptions, price breakdown, MOQ and delivery milestones. The website does not establish one universal quotation for every custom project.
Conclusion
Choosing a custom kitchen utensil manufacturer is a design-control decision as much as a sourcing decision. Start with the real cooking task, convert the essential needs into a measurable specification, understand the component materials and manufacturing route, and approve representative samples before paying for production commitments. The strongest programs make tooling rights, testing scope, quality checks, packaging and change approval as clear as the visible product design.
BONET HOUSEWARE provides kitchen utensil product references, published manufacturing information and OEM/ODM development services that buyers can use to begin a technical sourcing conversation. The next step is not an unsupported claim of instant customization; it is a practical discussion of what your design requires, what the factory can verify and how both teams will control the first order and every reorder.