

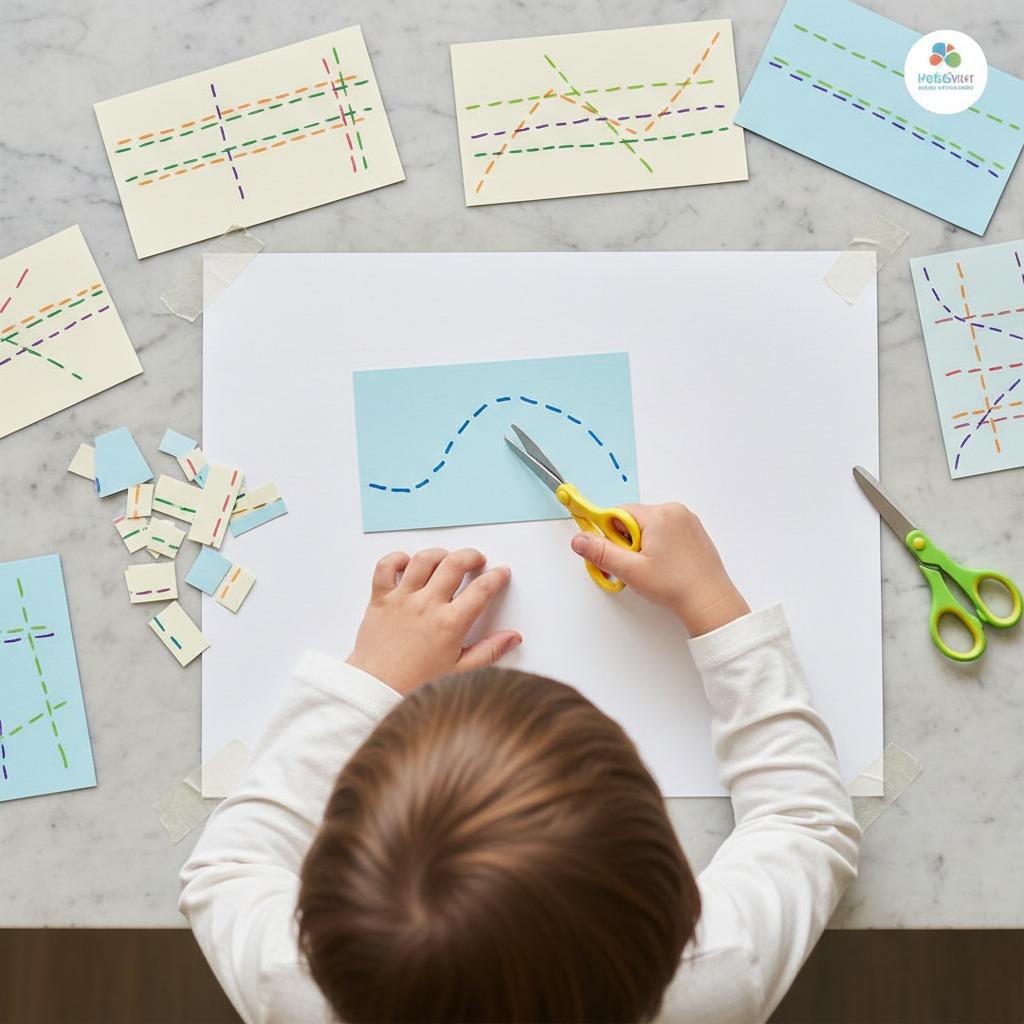
Hand-Eye Coordination Exercises Using Only Paper and Scissors
Hand-eye coordination improves when the eyes, hands, and attention work together on a clear task. Paper cutting is a simple way to practice that connection because the child can see the line, feel the resistance of the paper, and adjust each snip in real time. With paper and a pair of school scissors, parents and teachers can create low-cost activities for fine motor practice, classroom warm-ups, occupational therapy support, or screen-free play.
The goal is not speed or perfect crafts. The goal is controlled movement: opening and closing the scissors, turning the paper, stopping at corners, and following a visual path. Start with short sessions, offer close supervision, and choose difficulty levels that match the child’s current ability.

Key Takeaways
- Paper cutting can support hand-eye coordination, focus, bilateral coordination, and fine motor control.
- Begin with thick straight lines before moving to curves, corners, folded paper, and mazes.
- For smoother cutting, teach children to turn the paper with the helper hand instead of twisting the scissor hand.
- Short, repeated practice sessions are usually more useful than one long cutting activity.
- Adults should supervise children and select scissors appropriate for the user’s age and skill level.
Why Paper and School Scissors Work Well
Cutting paper requires several skills at the same time. The eyes track the printed or drawn path. The dominant hand operates the scissors. The other hand holds and rotates the paper. The brain compares the intended line with the actual cut and makes small corrections. This makes paper cutting a practical coordination exercise, not just a craft activity.
School scissors are commonly used for these exercises because they are familiar in classrooms and often designed with blunt tips for student use. However, adults should still check comfort, hand fit, blade condition, and suitability for the child. A tool that is too large, too stiff, or too dull can make the task frustrating and may encourage poor hand posture.
Before You Start: Setup and Safety Checklist
A calm setup helps children focus on the movement instead of struggling with materials. Use standard printer paper for easy cutting, construction paper for more resistance, and scrap paper for free practice. Seat the child with feet supported when possible, and place the paper directly in front of the body.
- Use age-appropriate scissors and supervise all cutting activities.
- Model how to carry scissors safely, with blades closed and pointed down.
- Show where the thumb goes and how the fingers support the lower handle.
- Keep the cutting path large and bold for beginners.
- Stop before fatigue causes frustration or careless cutting.
Exercise 1: Straight Line Cutting
Straight lines are the best starting point because the child can concentrate on opening and closing the scissors without managing curves. Draw several horizontal, vertical, and diagonal lines on paper. Begin with wide marker lines, then progress to thinner pencil lines as control improves.
Ask the child to cut slowly from one edge of the paper to the other. Encourage steady breathing and small adjustments. If the cut drifts away from the line, pause and restart rather than rushing to correct it. This activity builds accuracy, focus, and confidence.
Exercise 2: Curves, Waves, and Simple Shapes
Once straight lines feel comfortable, add wavy lines, circles, squares, triangles, and simple outlines. Curves require continuous adjustment, while corners teach the child to stop, reposition the paper, and begin again. The helper hand becomes especially important here.
A useful coaching phrase is: “Scissors stay forward; paper turns.” This reminds the child not to twist the wrist into uncomfortable angles. For younger children, draw large shapes first. Older children can try smaller shapes or mixed patterns, such as a circle followed by a zigzag border.
Exercise 3: Fringe Cutting and Snip Control
Fringe cutting is simple but effective. Draw a stop line across the top of a strip of paper. The child makes repeated snips from the bottom edge toward the stop line without cutting all the way through. This teaches controlled opening and closing, stopping accuracy, and spacing.
To add variety, make “grass,” “hair,” “feathers,” or “sun rays” from the fringe. Children who are not ready to cut along long lines may succeed with short snips first, making this a good bridge activity for beginners.
Exercise 4: Paper Snowflakes and Folded Cutting
Folded paper activities add a new challenge because the child cuts through more than one layer and predicts what the pattern will look like when opened. Start with a simple folded square or triangle. Draw large notches, half-circles, or triangles along the folded edges and cut them out carefully.
When the paper is unfolded, the child sees symmetry in action. This supports pattern awareness and planning, while still developing scissor control. Avoid tiny details at first, because thick folded layers may be harder to cut.
Exercise 5: Maze and Path Cutting
Mazes and paths are useful for children who can already cut lines and curves. Draw a road, river, racetrack, or animal path on paper. The child cuts along the path while staying between the boundaries. This adds problem-solving because the child must look ahead, slow down before turns, and decide when to rotate the paper.
Keep the first maze wide and simple. Increase difficulty by narrowing the path, adding more turns, or including stop signs where the child must pause before continuing.
Activity Comparison and Progression Table
| Activity | Best For | Difficulty | Skill Focus | Progression Tip |
|---|---|---|---|---|
| Straight line cutting | Beginners | Easy | Basic control and visual tracking | Move from thick marker lines to thin pencil lines |
| Fringe cutting | Early scissor users | Easy | Snip control and stopping | Add a clear stop line and reduce spacing gradually |
| Curves and shapes | Developing users | Moderate | Turning paper and corner control | Start with large shapes before smaller outlines |
| Folded snowflakes | Confident cutters | Moderate | Planning and symmetry | Use simple cuts before detailed patterns |
| Maze cutting | Advanced practice | Moderate to hard | Accuracy, attention, and path following | Narrow the path only after success with wide paths |
How to Choose Scissors for Practice
For scissor skill activities, comfort and control matter more than appearance. Look for scissors that fit the child’s hand, open and close smoothly, and are appropriate for the setting. If sourcing scissors for a classroom, daycare, or activity program, ask suppliers practical questions: What age range is the product intended for? Are there left-handed options? What handle sizes are available? How should the scissors be cleaned and stored? Are replacement policies or bulk packaging options available?
Do not assume every pair of school scissors performs the same way. Test a sample on common classroom paper before ordering in quantity. Check whether children can open the blades without excessive force and whether the handles cause pressure points during repeated use.
Practice Tips for Parents and Teachers
- Practice for 5 to 15 minutes, depending on the child’s age and attention span.
- Demonstrate slowly, then let the child try without constant correction.
- Praise specific actions, such as “You stopped at the corner” or “You turned the paper carefully.”
- Save dated samples to show progress over time.
- Use themes the child likes, such as roads, animals, food shapes, or seasonal decorations.
If a child avoids cutting, complains of hand pain, or cannot manage basic snips after repeated practice, consider asking an educator or occupational therapist for guidance. Cutting should feel challenging but not discouraging.
FAQ
What age can children start using school scissors?
Readiness varies. Many children begin simple snipping activities in the preschool years, but adult supervision and age-appropriate scissors are essential. Start with short, easy tasks.
How often should children practice scissor skills?
Short sessions several times a week are usually effective. Five to fifteen minutes is enough for most children, especially when the activity is focused and positive.
Should the child move the scissors or the paper?
The scissors should generally point forward while the helper hand turns the paper. This improves control and reduces awkward wrist twisting.
What paper is best for beginners?
Printer paper is easy to cut, while construction paper provides more resistance. Beginners often benefit from slightly sturdier paper because it does not flop as much.
Are these exercises only for children?
No. Paper cutting can also be used by adults for coordination practice, craft warm-ups, or gentle fine motor activities, provided the task matches the person’s ability and safety needs.